Building Odyssey

Propeller Shaft Struts
Friday, November 18, 2011

One of the last really tricky and critical bits of welding and fabrication was the prop shaft strut assembly. The cutlass bearing resides inside a turned aluminum housing. The I.D. is 2.375” , to fit the non-metallic bearing, and the OD is 3.625 . It is is 6.5” long. The struts are made from .75” plate. The struts form an included angle of 55˚. They extend through the hull and are welded to the aft side frame J. There are .375” thick elliptical doubler plates on the exterior. These could not be placed inside the hull due to space restrictions, so I made double sure that the welds around the doublers were perfect so as to prevent any water getting between the doublers and the hull and causing corrosion.
All of this would have been quite straightforward had the shaft exited the hull symmetrically on the centerline. Instead, the shaft is offset to Port by 1˚ to facilitate removal past the rudder. This meant that the two struts would have different geometries.
Strut yo’ stuff.

Using a dummy shaft held centered by the engine coupling and bushings in the stern tube, I placed the cutlass housing onto the shaft, held centered by turned UHMW bushings . I used this material because I didn’t want them to get stuck . Using wooden templates, I empirically determined where the slots in the hull should be cut, or rather could be cut, due to the fact that inside there are stringers, the frame and the centerline stringer that must be worked around. Of course, I cut them slightly wrong, but the beauty of the miracle metal is that gaps can be filled. There were so many different angles occurring at this intersection it became a matter of getting a good fit, rather than calculating some theoretical ideal and then struggling to make that work. The interior angle of 55˚ came from Gerr’s book on systems and seemed logical, so I aimed for this.
I also made sure that I had enough clearance to work with either of my two prop options: The Seahawk Autostream stainless steel 3 blade feathering, or the bronze MaxProp. With a calculated diameter of 19 or 20” depending on who you ask, I had plenty of tip to hull clearance, typically defined as a minimum of 15% of the prop diameter.
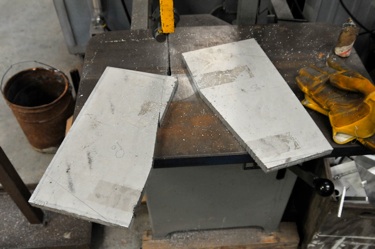
Once I had the templates fitting well inside and out, I transferred the shape to the 3/4” 5086 plate and cut them on the bandsaw. The leading and trailing edges were simply radiused with a router. This should be fine in our slow speed boat - a high speed craft would want to have the struts foil shaped. Then it was a matter of welding the struts in place. Very slowly, so as not to overheat and warp the tube or the hull. Once the struts were welded to frame J, they weren’t going anywhere.

I made the doubler plates in 2 halves each, then mig welded them in place, followed by overwelding with the tig. Welding overhead on heavy material isn’t my idea of a picnic, but, by working incrementally, I got it welded tight. Cleanliness is key, keeping the mig nozzle well reamed , the surfaces wire-brushed frequently and the tig electrode clean.

Above is the view inside at Frame J. I had to remove a section of the Tee stringer. I still need to angle cut the end of the stringer.
The moment of truth came when I re-inserted the dummy shaft through all of the bushings and, drum-roll please, right into the shaft coupling on the engine. My worries about misalignment due to weld warpage proved groundless, because I followed proper welding procedures, and because the strut attachment was well designed to be very rigid.


And finally, I checked the clearance of the shaft past the rudder. Perfect, about 3mm! I still have to drill the holes for the set screws in the bearing housing, something I should have done before installing it, but not much of a problem. And I then have to coax the cutlass into the housing, a very tight fit. I think I’ll go ahead and make the tool, so when time comes years from now, I’ll be able to press the cutlass back out of the housing. Plan ahead, put credit into your black box.


