Building Odyssey

Portlights
Tuesday, May 17, 2011

For my Dix 43 I chose Newfoundmetal's cast 316 stainless portlights as the best value, most robust and, for my purposes, most easily adapted to a metal boat hull installation. Most commercial portlights are designed for installation in a thin fiberglass hull, with a metal trim ring on the outside. I wanted my ports to be flush with the interior wall surface, thus requiring an internal spigot to project the port about 70mm into the boat. From the outside the port appears quite recessed, which will help with the perennial glare problem.
Still more holes in the boat.

The first step was to use the trim ring as a drag pattern for plasma cutting the 6mm (1/4") inner flange. This was a pleasant surprise to be able to use this trim ring, as I was expecting to have to make some patterns. Eventually I did saw the outside dimension down some, but the inside cut was just right.
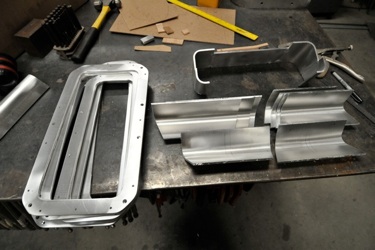
Next I drilled all of the holes for attaching the light to the flange, plus some holes for attaching furring strips to support the cabin wall covering around the ports. The holes for the light were fitted with 5/16-18 Primer Free II Helicoils. I press-braked a number of lengths of 3/16 (5mm) 5086 using my homemade press and the .75" radius die. This radius was the same as the inside corners of the port flange, another pleasant serendipity. Then I cut these bent strips to length to form the four corners of the inner spigot. Because the coach roof cabin side slopes in at 20˚ I cut the sections at this angle. Here's where making these out of the miracle metal is so much easier than steel: these miter cuts can be done with a woodworker's chop saw! I suppose one could use an abrasive saw on steel, but the precision is not there. Or buy a nice cold saw for several thousand. It can be done in steel of course, but with more difficulty.These spigot parts were left long to be trimmed during installation.

For most of the lights I was able to trim (on the tablesaw!) the side legs of the spigot angle parts to size, then tack them together. On a few of the larger ones I had to insert a piece between them, in the same way that pieces of flat were cut for the top and bottom.The bottom piece is angle down for drainage, the angle being determined by the maximum permitted by the dimension between the spigot's lower edge and the side deck. Because the cabin sides are narrow, especially going forward, and because we did not want the portlight extending up into the ceiling past the bottom edge of the deckbeams+ceiling material, there was very limited space available. This took quite a long time and lots of head scratching for us to figure out.In the end we decided it was okay to have the bottom of the spigot angled at 10˚ for drainage, even if this meant it was practically flush with the deck.The deep recess will preclude any casual kicking of the light, and since the decks are angle as well, drainage shouldn't be a big issue.

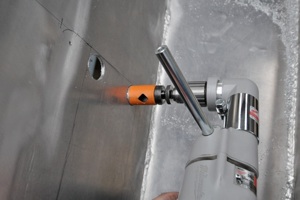


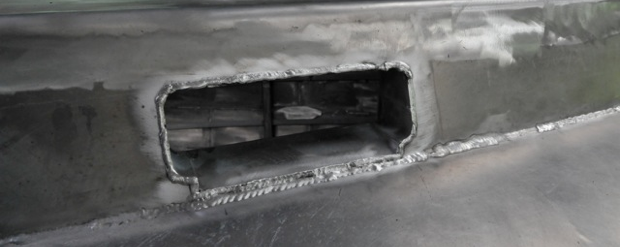

Installation required careful measuring and precise cutting. I drilled the corners with a hole saw to produce neat radii, then connected the dots by cutting with the "meat axe" (safety, safety, safety!)
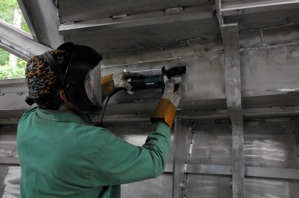
A bit of die grinder work to fit the spigot and in they went. I cut some wood spacer blocks to hold the spigot in position , and then scribed the outside of the spigot to be cut off flush with the cabin side. Remove, cut, replace. Tack. Weld. Repeat.
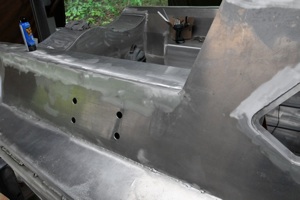
In all we have 8 opening portlights. We decided against putting any in the hull below the sheer, as we feel this is unseaworthy and a bad trend in current yacht design. Besides, we're tall enough to see out of these coach roof ports.
The last task was to grind and sand the outer weld flush with the cabin sides. I believe it is vital to spend the time doing this, going back and filling small defects and making it look perfect. Attention to these sorts of details will make a huge difference in the appearance of the boat, and the satisfaction I derive from being on her.


