Building Odyssey

Head Compartment (AKA the bathroom)
Monday, February 20, 2012
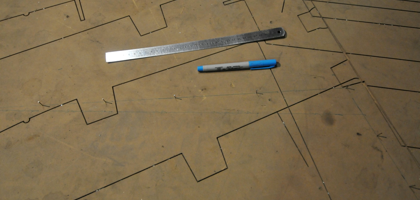
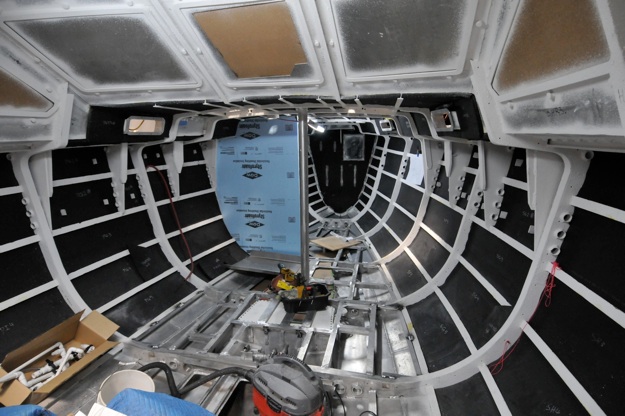
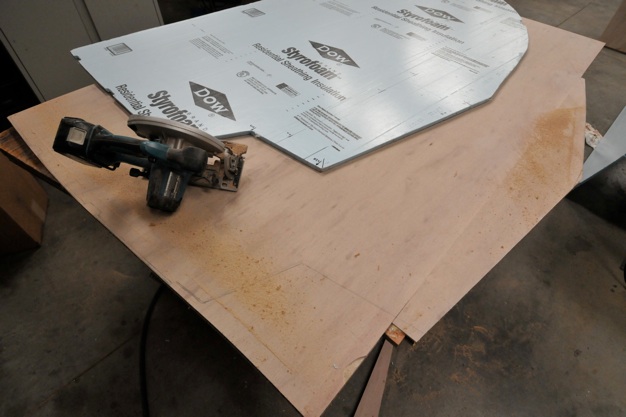
The bathroom, or as certain nautical types insist on calling it, the head (which is actually the thing you sit on), is certainly one of the most functionally defined spaces on a boat, or a house for that matter. It is the smallest space, and there are several functions that must coexist in a marine bathroom. Would that we had space for a separate shower, but that would have eliminated my workshop area, along with it’s convertible single berth. So the little room will have to make double duty fro both toilet and shower. And vanity. Now, you can draw plan views and elevations all day long, but nothing is a substitute for a full size mockup. It was recommended to me by John in Newburyport that I use some 1/2” blue insulating foam to create the patterns for the bulkheads and walls, and this method worked very well. Since we already had the full size frame building templates that were incised into the MDF board 3 years ago, it was easy to produce the correct curve of the hull at frame E by placing small brads along the lines ( offset to the inside of course) and then pressing the foam board onto the nails to create a connect-the-dot tracing. A razor knife sliced away the excess and a few refinements created a very functional pattern. Hauling the light foam up and down the stairs to the boat is a breeze. It is quite astounding to suddenly close in some space inside the hull which has heretofore been wide open.
Defining space.

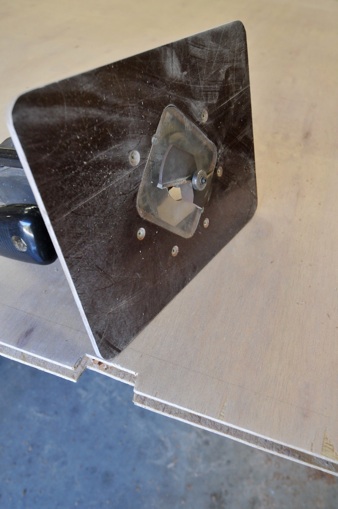
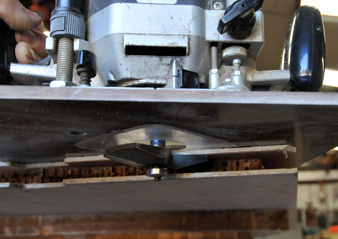
The bulkhead at E, the forward wall of the head, is about 54’ wide, so piece of the Tricell had to be spliced onto the 48” wide panel. I finally figured out to use an old panel raising router bit on my trusty variable speed router to rout away the kraft paper honeycomb core of the Tricell along the edges and at the splice joint. I wanted to glue in some solid wood around the edges so that the bolts holding the wall to the frame wouldn’t dig into the panel as I tightened them. A tablesaw works fine for small pieces, like access hatches, but for a full panel it would be impossible to hold the panel properly and feed it through. The router works great, a pass made from each side of the panel, depth of cut 1-3/8”, very consistent. Then I can glue in some solid wood, 5/8 x 1-1/4”. Since the kraft core is glued to the ply skins with polyurethane glue, I decided to use that as well. it’s sort of messy, but I like its gap-filling properties. Yellow glue will not really fill a gap. Working with the Tricell panels takes some getting used to, and is more work than traditional VC plywood, but the weight savings is enormous. The panels get epoxy clear-coated with 2 or 3 coats. The interior walls of the head will be sealed agin with epoxy after they are all assembled, with corner joints filleted and sanded. Then it will be painted with Pettit EZ Cabin, which contains a mildewcide. Simple, direct, repairable.
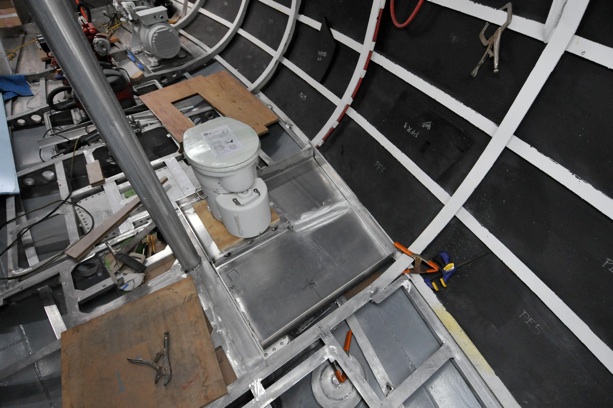

The floor in the head is made of press braked aluminum plate, 3/16” thick. The Air Head composting throne sits on a raised dais which has a large access panel. The floor is the shower pan, with a drain. It will be coated with e rubberized paint we will also use on the deck. I’ll detail the construction of this pan in a future entry. Before all of this can get put together -wall and floors- we have to get as much of the equipment and systems installed in the bilge as possible: plumbing mostly, hot and cold lines, hydronic heating line, pumps, sensors, some wiring for the pumps. It’s a great feeling to be diving into the interior construction. And of course, the first room to be built is the most important!


