Building Odyssey

Freshwater Plumbing
Wednesday, March 7, 2012
It seems premature to be installing plumbing pipes, but long reflection and reason have brought me to the conclusion that it is prudent. There are many different ways to finish a boat interior, and different sequences dictated by the methods and materials. My way is certainly not the only way, nor the best, I’m sure, but it is my way, fit to my particular brand of logic and comfort. Next time (I can hear Helen now:Next time!! ) I may do it very differently. In any case, my sequence of events is roughly as follows: sole(floor), bulkheads (interior walls), hull lining, furniture, ceiling. Wiring will need to be roughed in before the hull lining and ceiling are installed. Stuff that’s under the sole will be much easier to install before the sole boards are permanently attached, even though there will be lots of access hatches. Thus, since no wiring is going in the bilge, the plumbing is the thing to do. Below is a schematic of the freshwater system, which I must admit I prepared after the pipes went in. My original sketches were on paper , and went through many modifications. But for future reference, a clean diagram is a good idea. The essential concept is the distribution manifold for both hot and cold water. This manifold is located in a well drained area of our shallow bilge just forward of the water tanks, which are in the front half of the keel.
The Circulatory System


The two tanks have 1/2” nylon draw tubes that connect to 1/2” PVC pipe. A couple of ball valves control which tank is drawn from. PVC pipe is okay to use as long as it is very firmly supported and not in an area where it might get stepped on or otherwise stressed. The PVC pipe transitions to 1/2” PEX tube as it leads to the Whale Universal pump, and from there to the cold side of the manifold. A line is run aft to supply the water heater, which then feeds back to the hot side of the manifold. Lines then run from the manifold to the various devices: galley sink, lavatory sink and shower, transom shower and washer (yes, that’s right). There is a tee just after the supply valves that leads a line to a hand pump in the galley, for when the electric pump fails and we are out of spares. I placed the supply pump and the grey water pump in the bilge. Gasp. The decision was made to put them here in order to have easy access to them, and so that if they leaked the water wouldn’t spoil
the content or woodwork on some cabinet. There is a remote chance that they will one day be flooded. But, we reasoned, should that much water enter the boat then we will have much more serious issues than merely replacing a pump. We will have vacuum packed spares for both of them. They are high up in the bilge, and this part of the bilge drains directly to the sump. I can understand that in a boat with a 3’ deep bilge, one would not want to place a pump down in the bilge, but this is different. And should it turn into a problem, the PEX tubing is very easy to modify. Eyes wide open.
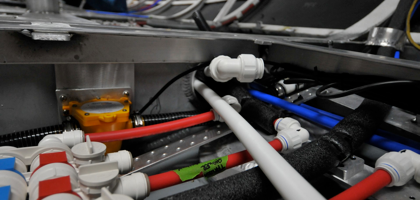
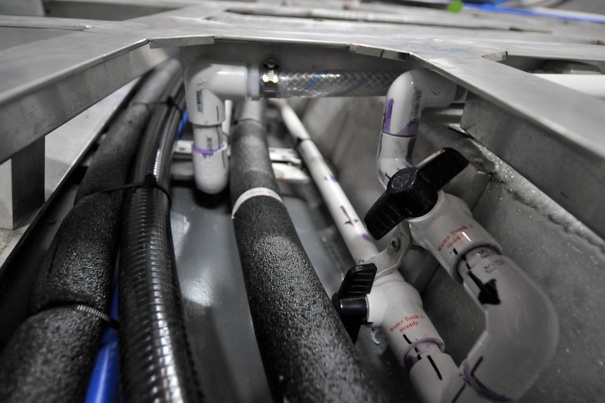
The hot water lines are all insulated with polyethylene sleeves, as are some portions of the cold (for chafe protection). In addition to the hot and cold freshwater lines there are 3/4” PEX lines for the future hydronic heating system (also insulated) and a 3/4’ line for the saltwater washdown line which will be fed from the intake in the sump. The holes through the frames, which I had once considered excessive, are now stuffed full.
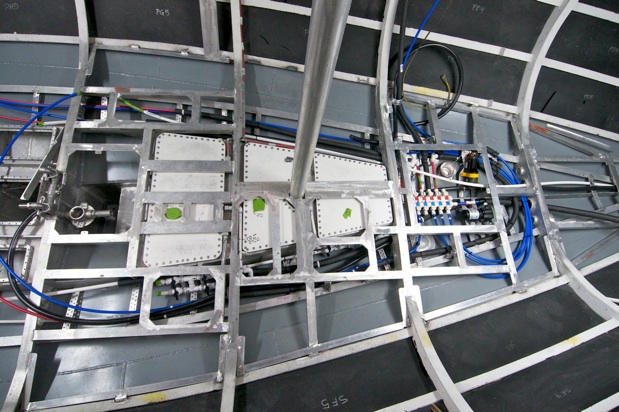
These are the fill valves, which allow the source to be selected from either deck fill or watermaker, as well as which tank gets filled. They are 3/4” PVC with flexible connections to the tanks.
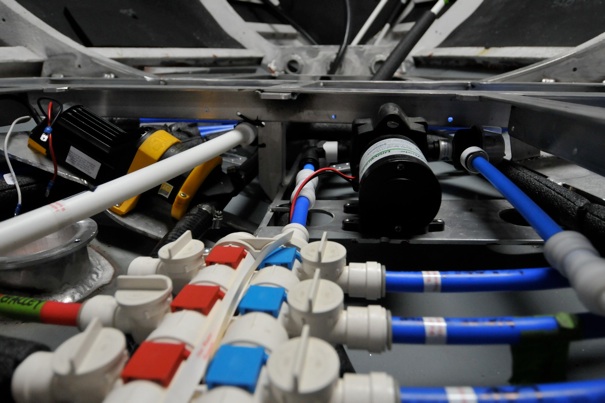
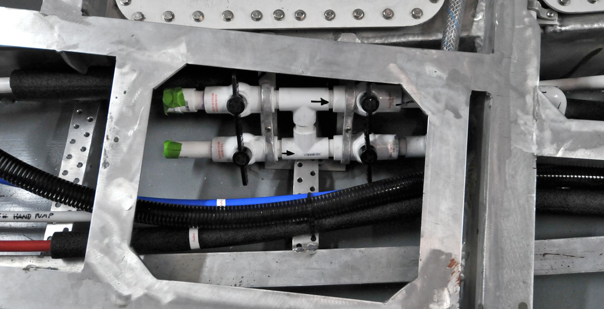
Above is a low down view of the supply valves. The shiny black hose is a 1” galley sink drain, which runs to the grey water sump.
Looking forward. The Whale Universal is on the Sb side, the Whale Gulper IC waste pump is to Po. The flanged aluminum housing on the left is an enclosure for the depth/speed transducer. The white line is the washdown.


